Setting up Expected Documents the right way
Last updated: April 28, 2026
💡 Before you start … What are Expected Documents? Think of Expected Documents as your document checklist. Instead of letting clients upload whatever they want, you define exactly which documents you need, from which person or company and Ondorse guides your clients through it automatically in the portal. Once uploaded, Ondorse matches the document to your checklist and marks it as ✅ done.
Ondorse allows for highly granular configurations, enabling you to define which documents are requested, optional, or not needed at all based on country, legal form, risk profile, or any other client attribute.
1. Create a new Expected Document
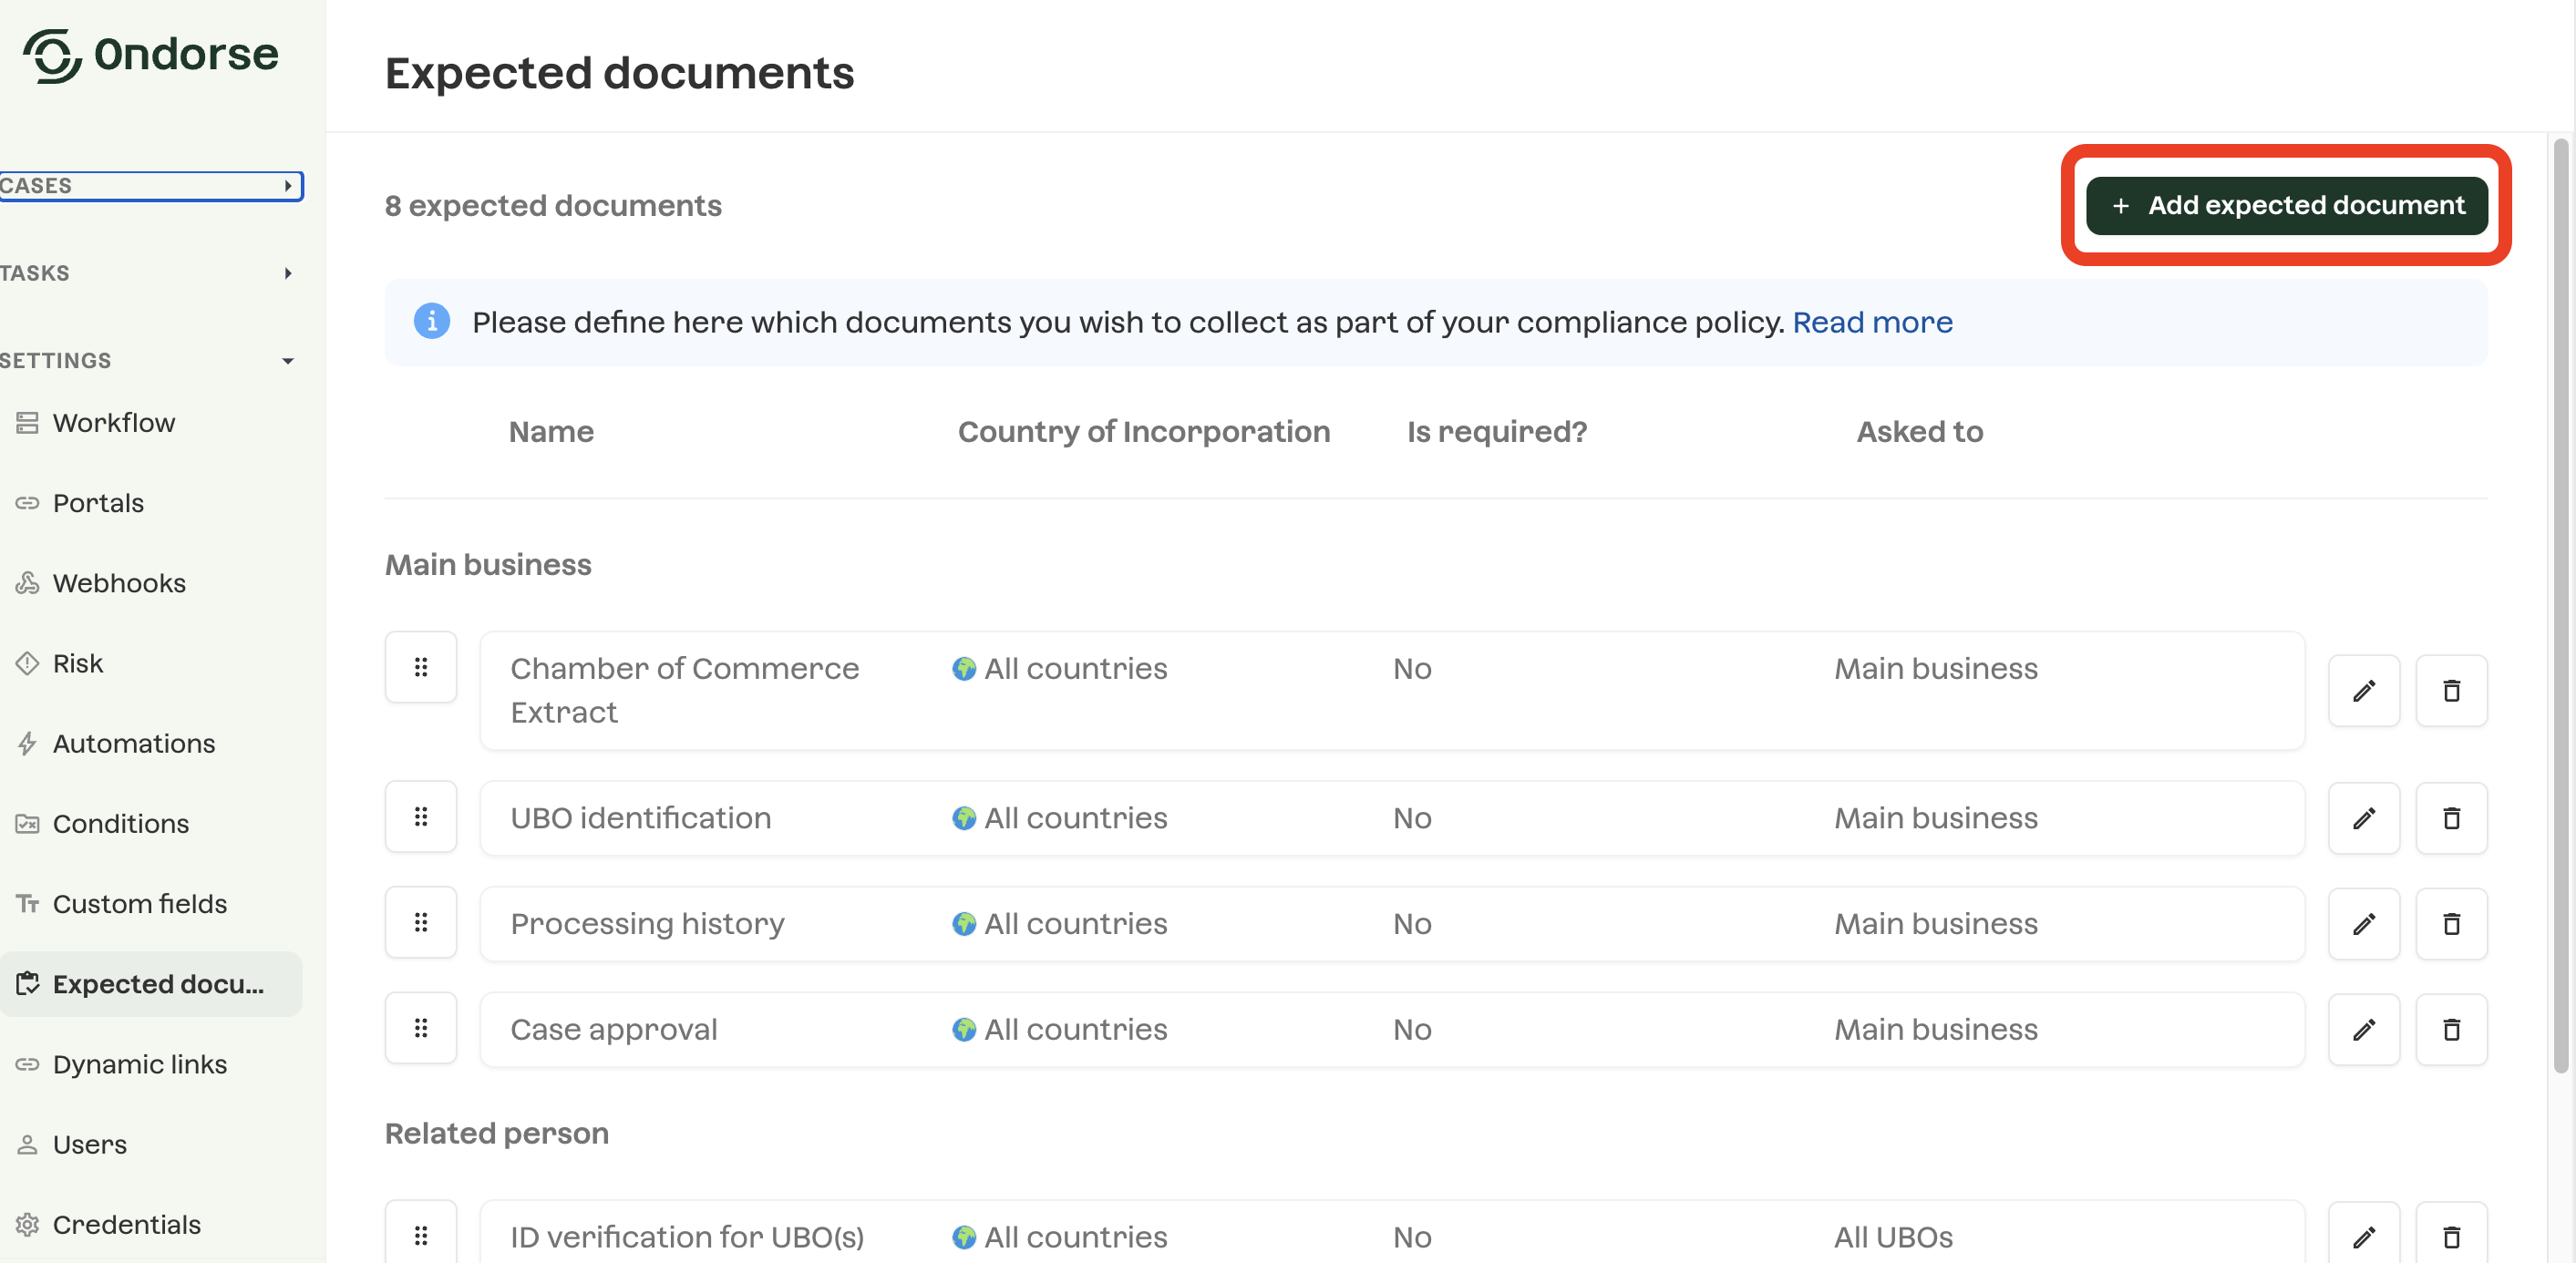
Go to Settings → Expected Documents → Add expected document.
Step 1: Set up the document name and description
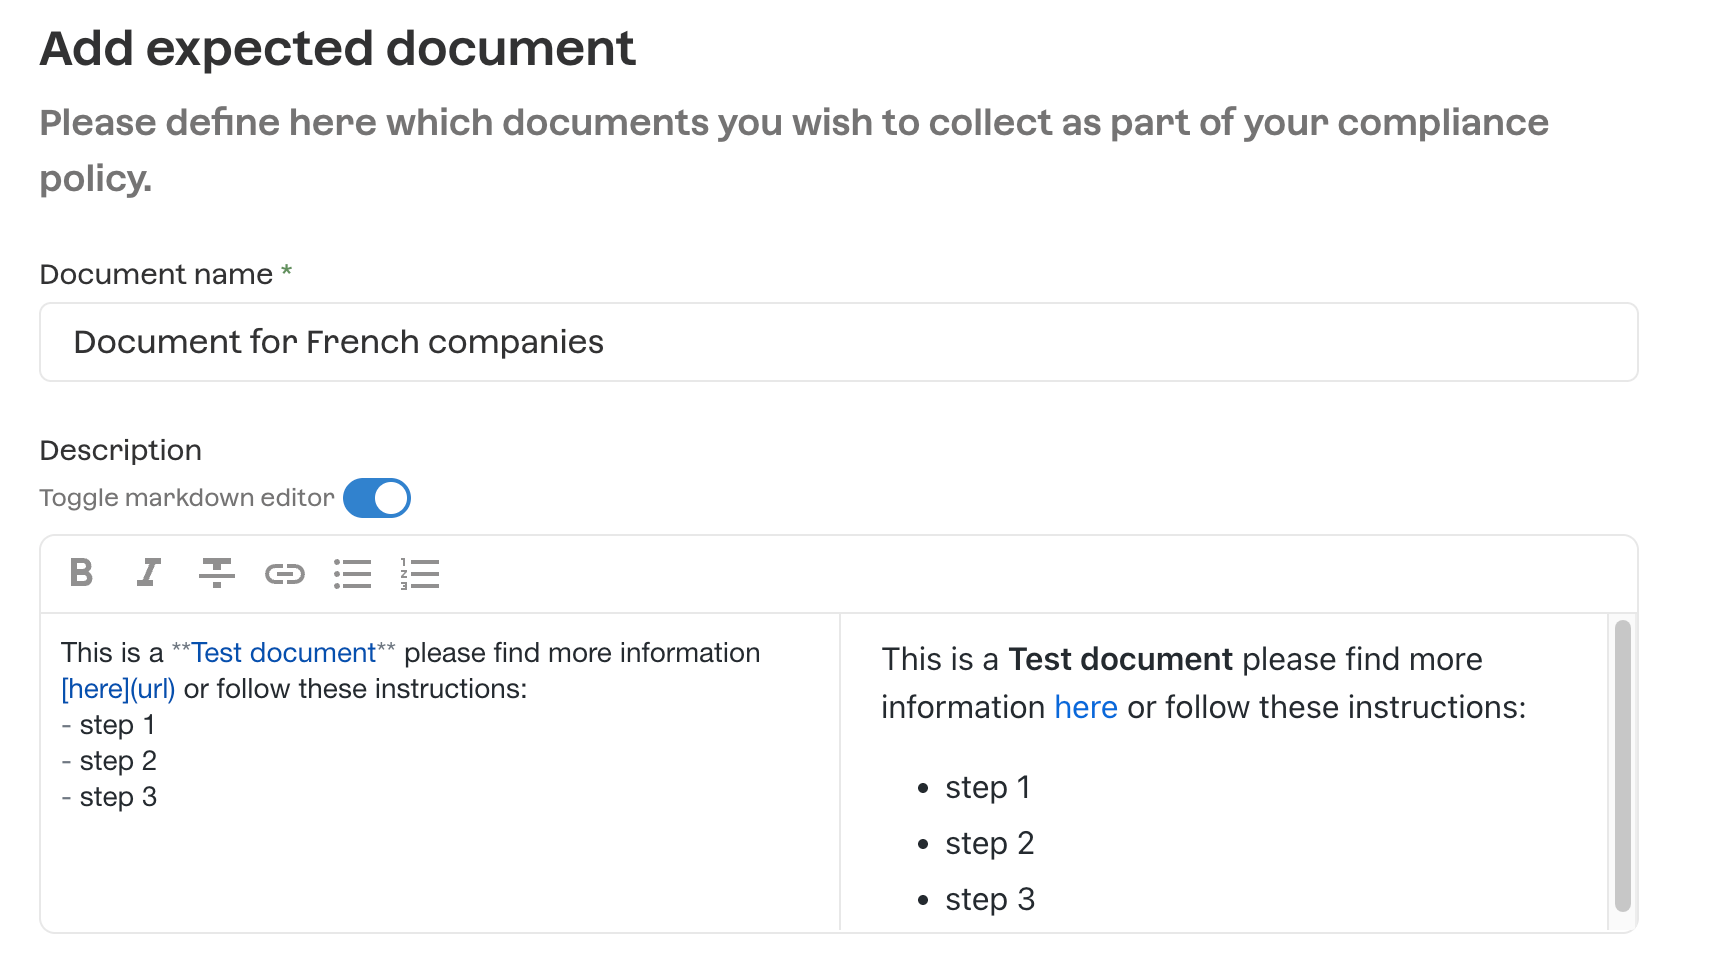
Define the name and description of your expected document as they will appear in your portal.
A markdown feature is available for the description. Use it to provide as much guidance as possible to your clients and significantly improve your conversion rate.
You can also insert a template link so clients can download a document to fill in.
Step 2: Choose who should provide the document (“Asked to”)
⚠ This is the setting most clients get wrong. If you ask for a document from the wrong person, Ondorse won’t match it correctly…. even if the document is uploaded.
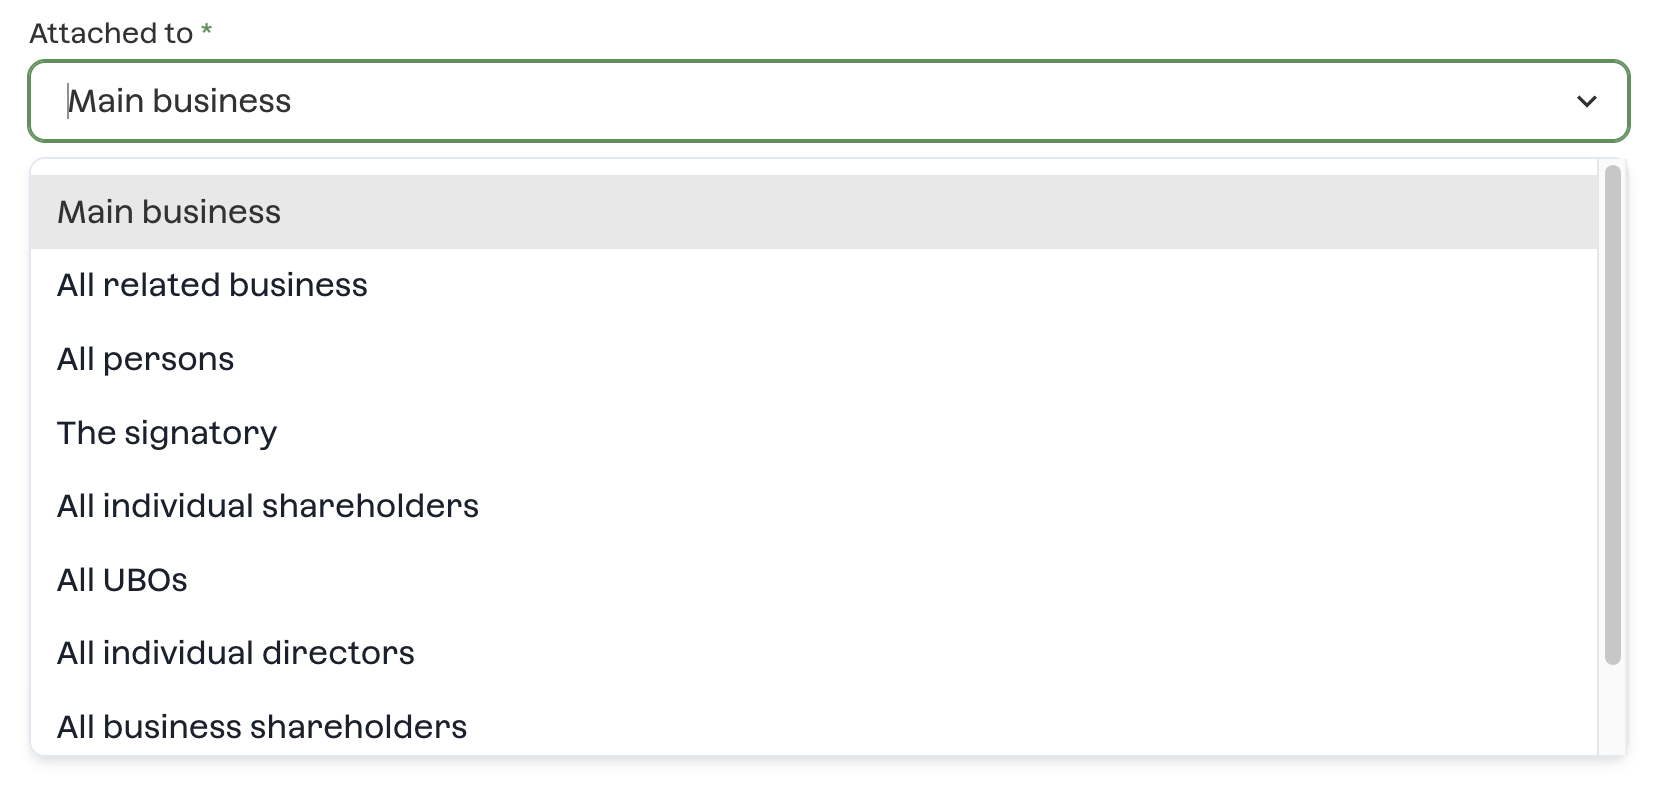
Pick who the document should be asked for — your portals will adapt dynamically 🪄
Option | When to use it |
All related business | Applies to all related businesses |
All persons | Applies to all related persons |
The signatory | The unique signatory on the case. Use for: identity docs, power of attorney |
All individual shareholders | All related persons that are shareholders |
All UBOs | All related persons that are UBOs (>25% ownership) Use for: ID documents required for UBOs |
All individual directors | All related persons that are directors. Use for: ID documents required for all directors |
All business shareholders | All related businesses that are shareholders |
All business directors | All related businesses that are directors |
📄 See also: Understanding related parties and roles
Step 3: Set up your country-specific configuration
Ondorse’s approach to expected documents is especially powerful for adapting requirements across different countries.
Default configuration (simplest)
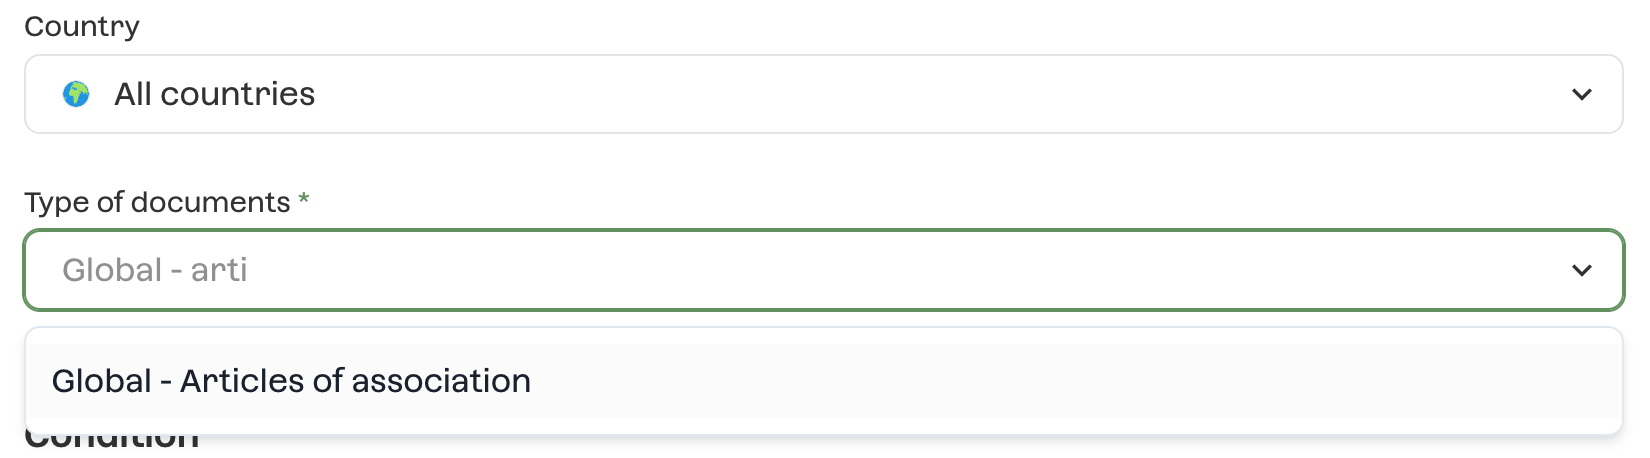
Select All countries and one or more Global document types. These will be requested from your client regardless of their country.
Restricting a document to a specific country
Use this when a document only exists in one of the countries you operate in.
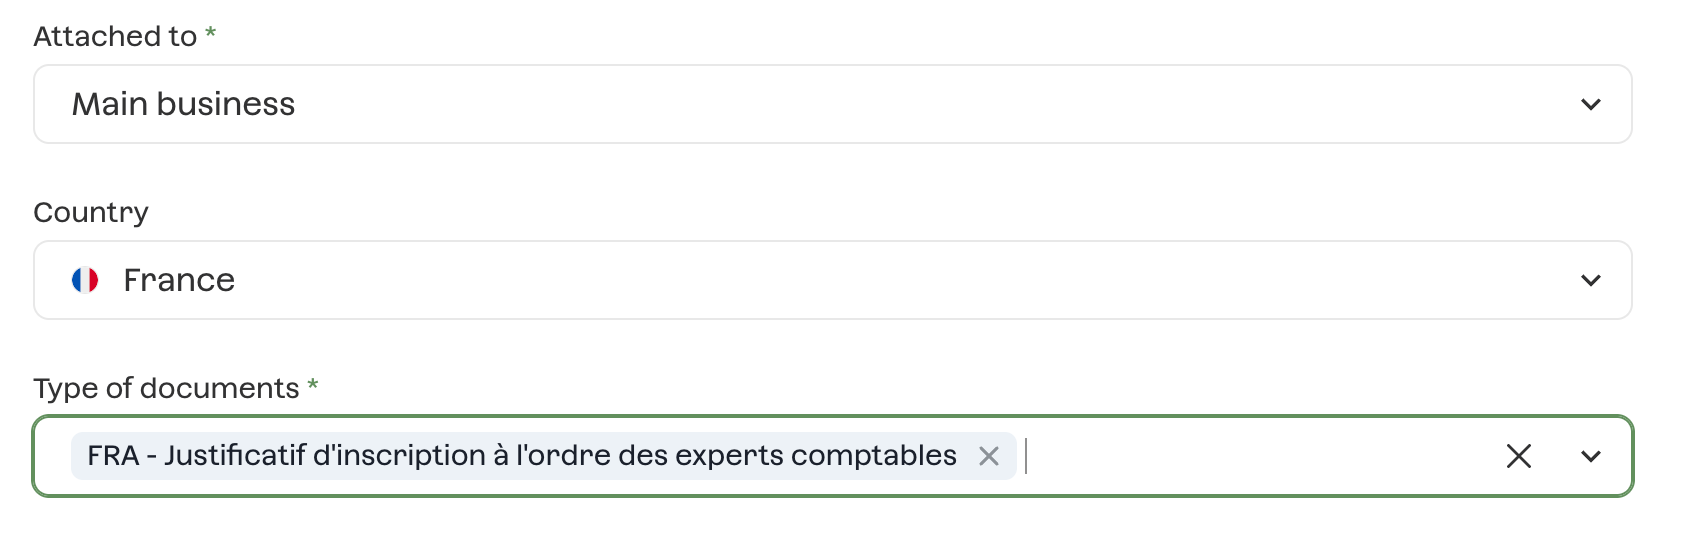
Differentiating document names by country
Suppose you operate in France, the UK, and Germany, but also have clients worldwide. You want to request each client’s Articles of Association, but under different names depending on the country.
To do this:
Add an expected document that applies to
All countriesThen specify, per country, which particular document(s) you will accept
Example:
Country | CountryDocument accepted |
🇫🇷 France | Statuts d’entreprise |
🇬🇧 United Kingdom | Articles of Association |
🇩🇪 Germany | Satzung or Gesellschaftsvertrag |
🌍 All other countries | Global document type (default) |
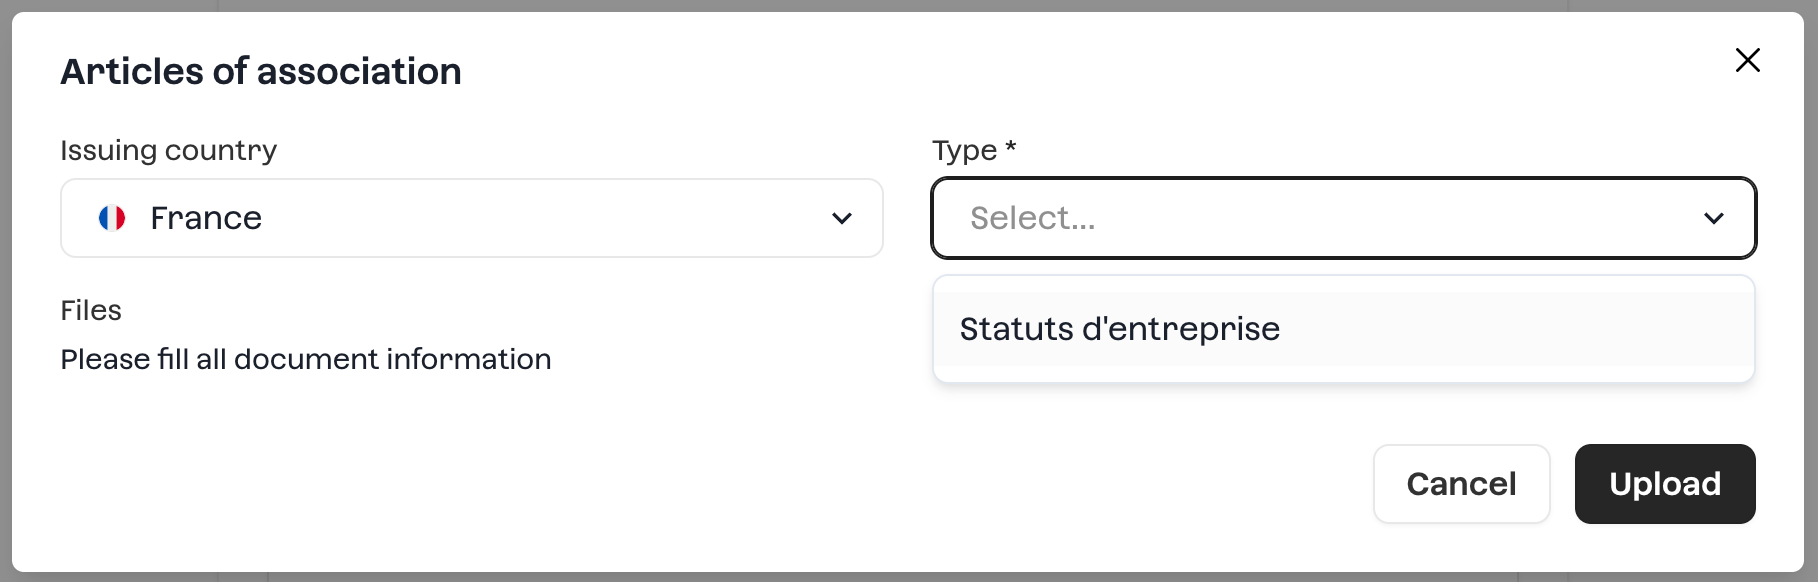
Step 4: Set up compliance requirements
Is the document required?
Toggle “Is required?” to yes if this document is mandatory for your compliance policy. Cases won’t be considered complete until this document is present.
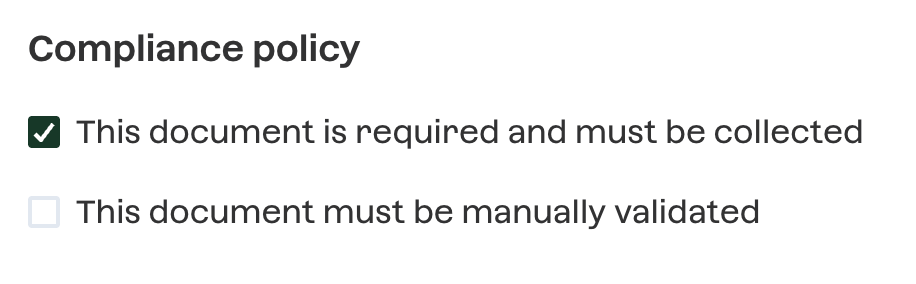
You can leave this unticked when:
The document is commercial (not compliance-related)
The document is only asked on specific occasions (available to your team for manual portal requests)
You can also decide whether the document will need to be manually validated to pass your compliance policy requirements.
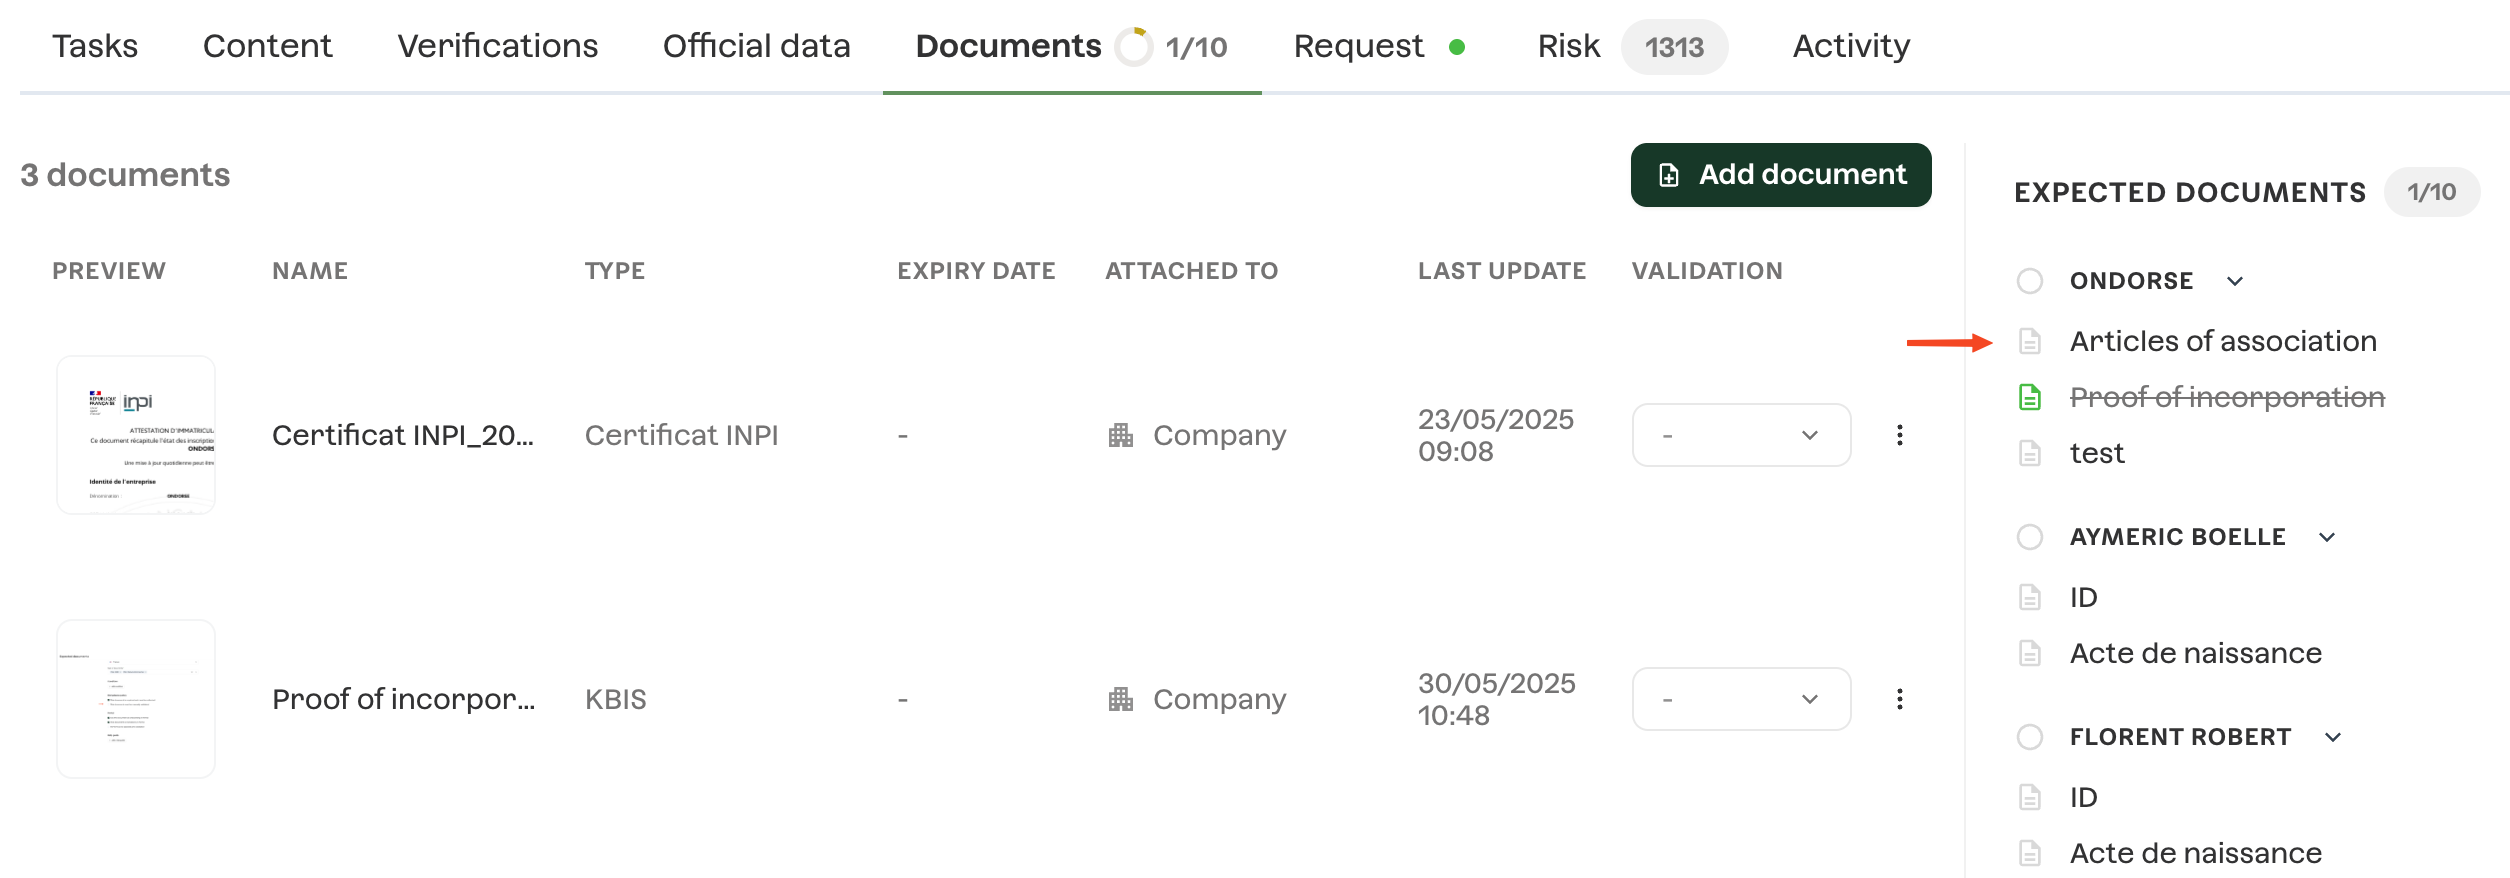
When you mark a document as required, three things happen automatically:
The document appears in the Document Collection Tracker in your cases
You are offered the option to add a Document Collection + Validation task to your workflow
The tracker and task adapt to whether manual validation has been requested
Should the document be asked to the customer in the portal?
You can choose to require the document in portal requests and make it mandatory or not.
💡 Pro tip: For countries with document download available from public registries, set up a Document download task. The document will be automatically retrieved — your customer only needs to confirm it’s correct. No upload needed.
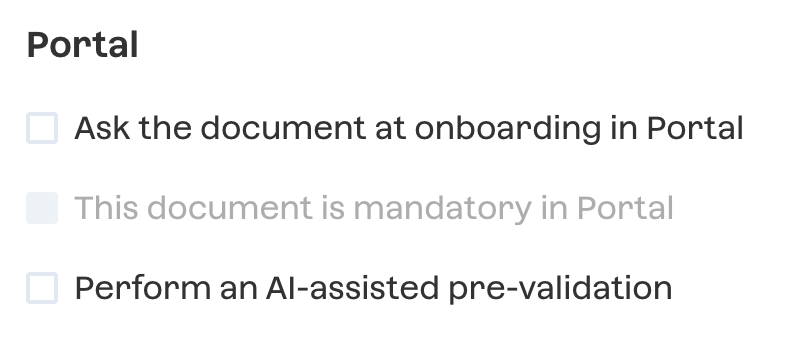
You can also enable AI-assisted pre-validation to warn customers when the wrong document type has been uploaded.
Finally, set up a help guide to help your customers understand exactly what to submit and how to stay compliant at every step.
2. How does Ondorse match uploaded documents?
When a client uploads a document in the portal, Ondorse automatically runs 4 checks to decide if it matches one of your Expected Documents:
# | Check | What it means |
1 | Document type check | Is the uploaded document type in the list of accepted types for this Expected Document? |
2 | Country check | If you have a country-specific config, Ondorse uses it. Otherwise falls back to default. |
3 | “Asked to” check | Was the document uploaded by the correct entity or role? A document “asked to Director” only matches if uploaded by a Director. |
4 | Condition check | If the Expected Document has an activation condition, is it met for this case? |
✅ All checks pass → Document matched. It is marked as fulfilled in the case view. When all required Expected Documents are matched, the case is complete.
⚠ Document uploaded but not matched? One of the 4 checks failed. The most common causes: wrong document type configured, document uploaded by the wrong person, or condition not met. Review your configuration in Settings → Expected Documents.
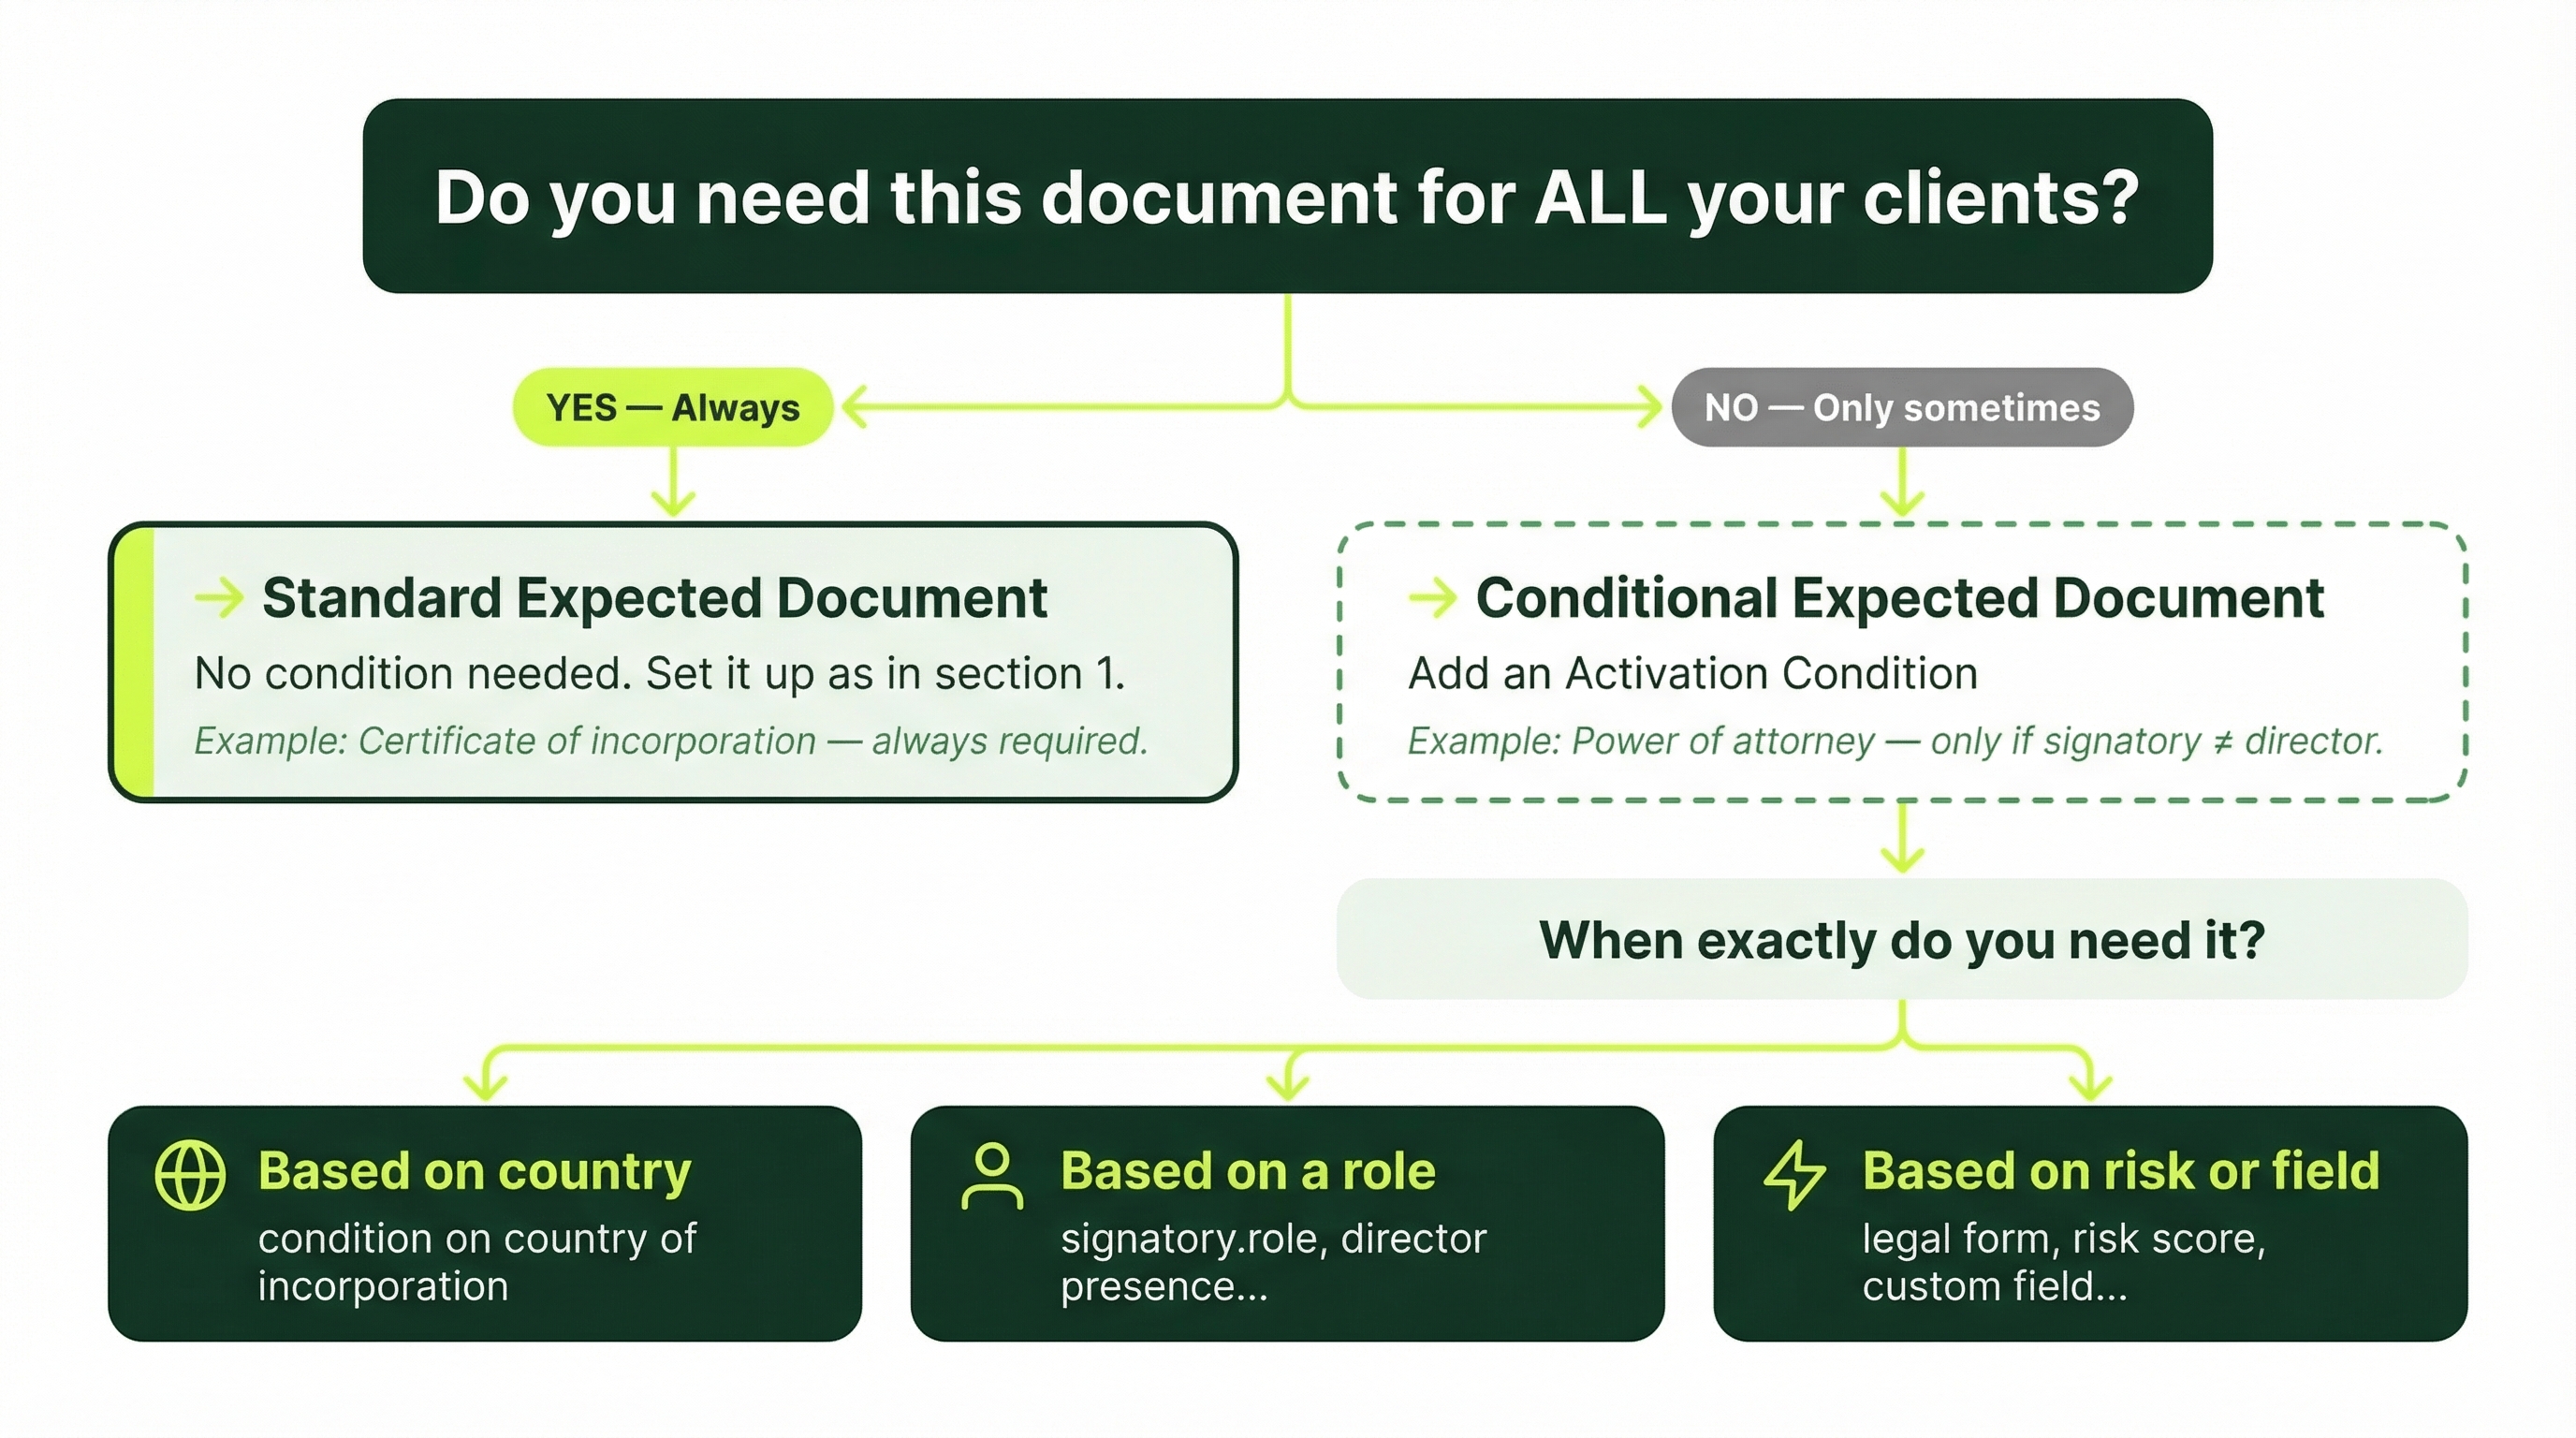
3. Do I need conditional documents?
Use this decision tree to figure out whether you need a standard or a conditional Expected Document:
4. How to add a condition to an Expected Document
Activation conditions allow you to fine-tune when specific document requests are triggered. Instead of applying the same requirements to every client, you can set up rules so that certain documents are only requested when particular criteria are met.
Step-by-step:
Open the Expected Document you want to make conditional (Settings → Expected Documents → click the document)
Click “Add condition” — this opens the condition builder (the same rule engine used in your workflow)
Build your condition:
Pick an existing activation condition you’ve already configured, OR
Use the ✨ condition builder to create a new one on the spot
Save and test in the sandbox before pushing to production
✅ Important: The condition is evaluated when the portal is opened, not when the document is uploaded. If the condition is not met at that moment, the document won’t be requested.
Real-world condition examples:
IF | THEN request |
Signatory role is NOT Director | Power of Attorney |
Country of incorporation = France | KBIS |
Legal form = Association | Proof of Funds |
Risk score = High | Source of Wealth declaration |
Country data coverage is low (NG, MA, KE…) | Articles of Association |
Client is a public company | Additional regulatory document |
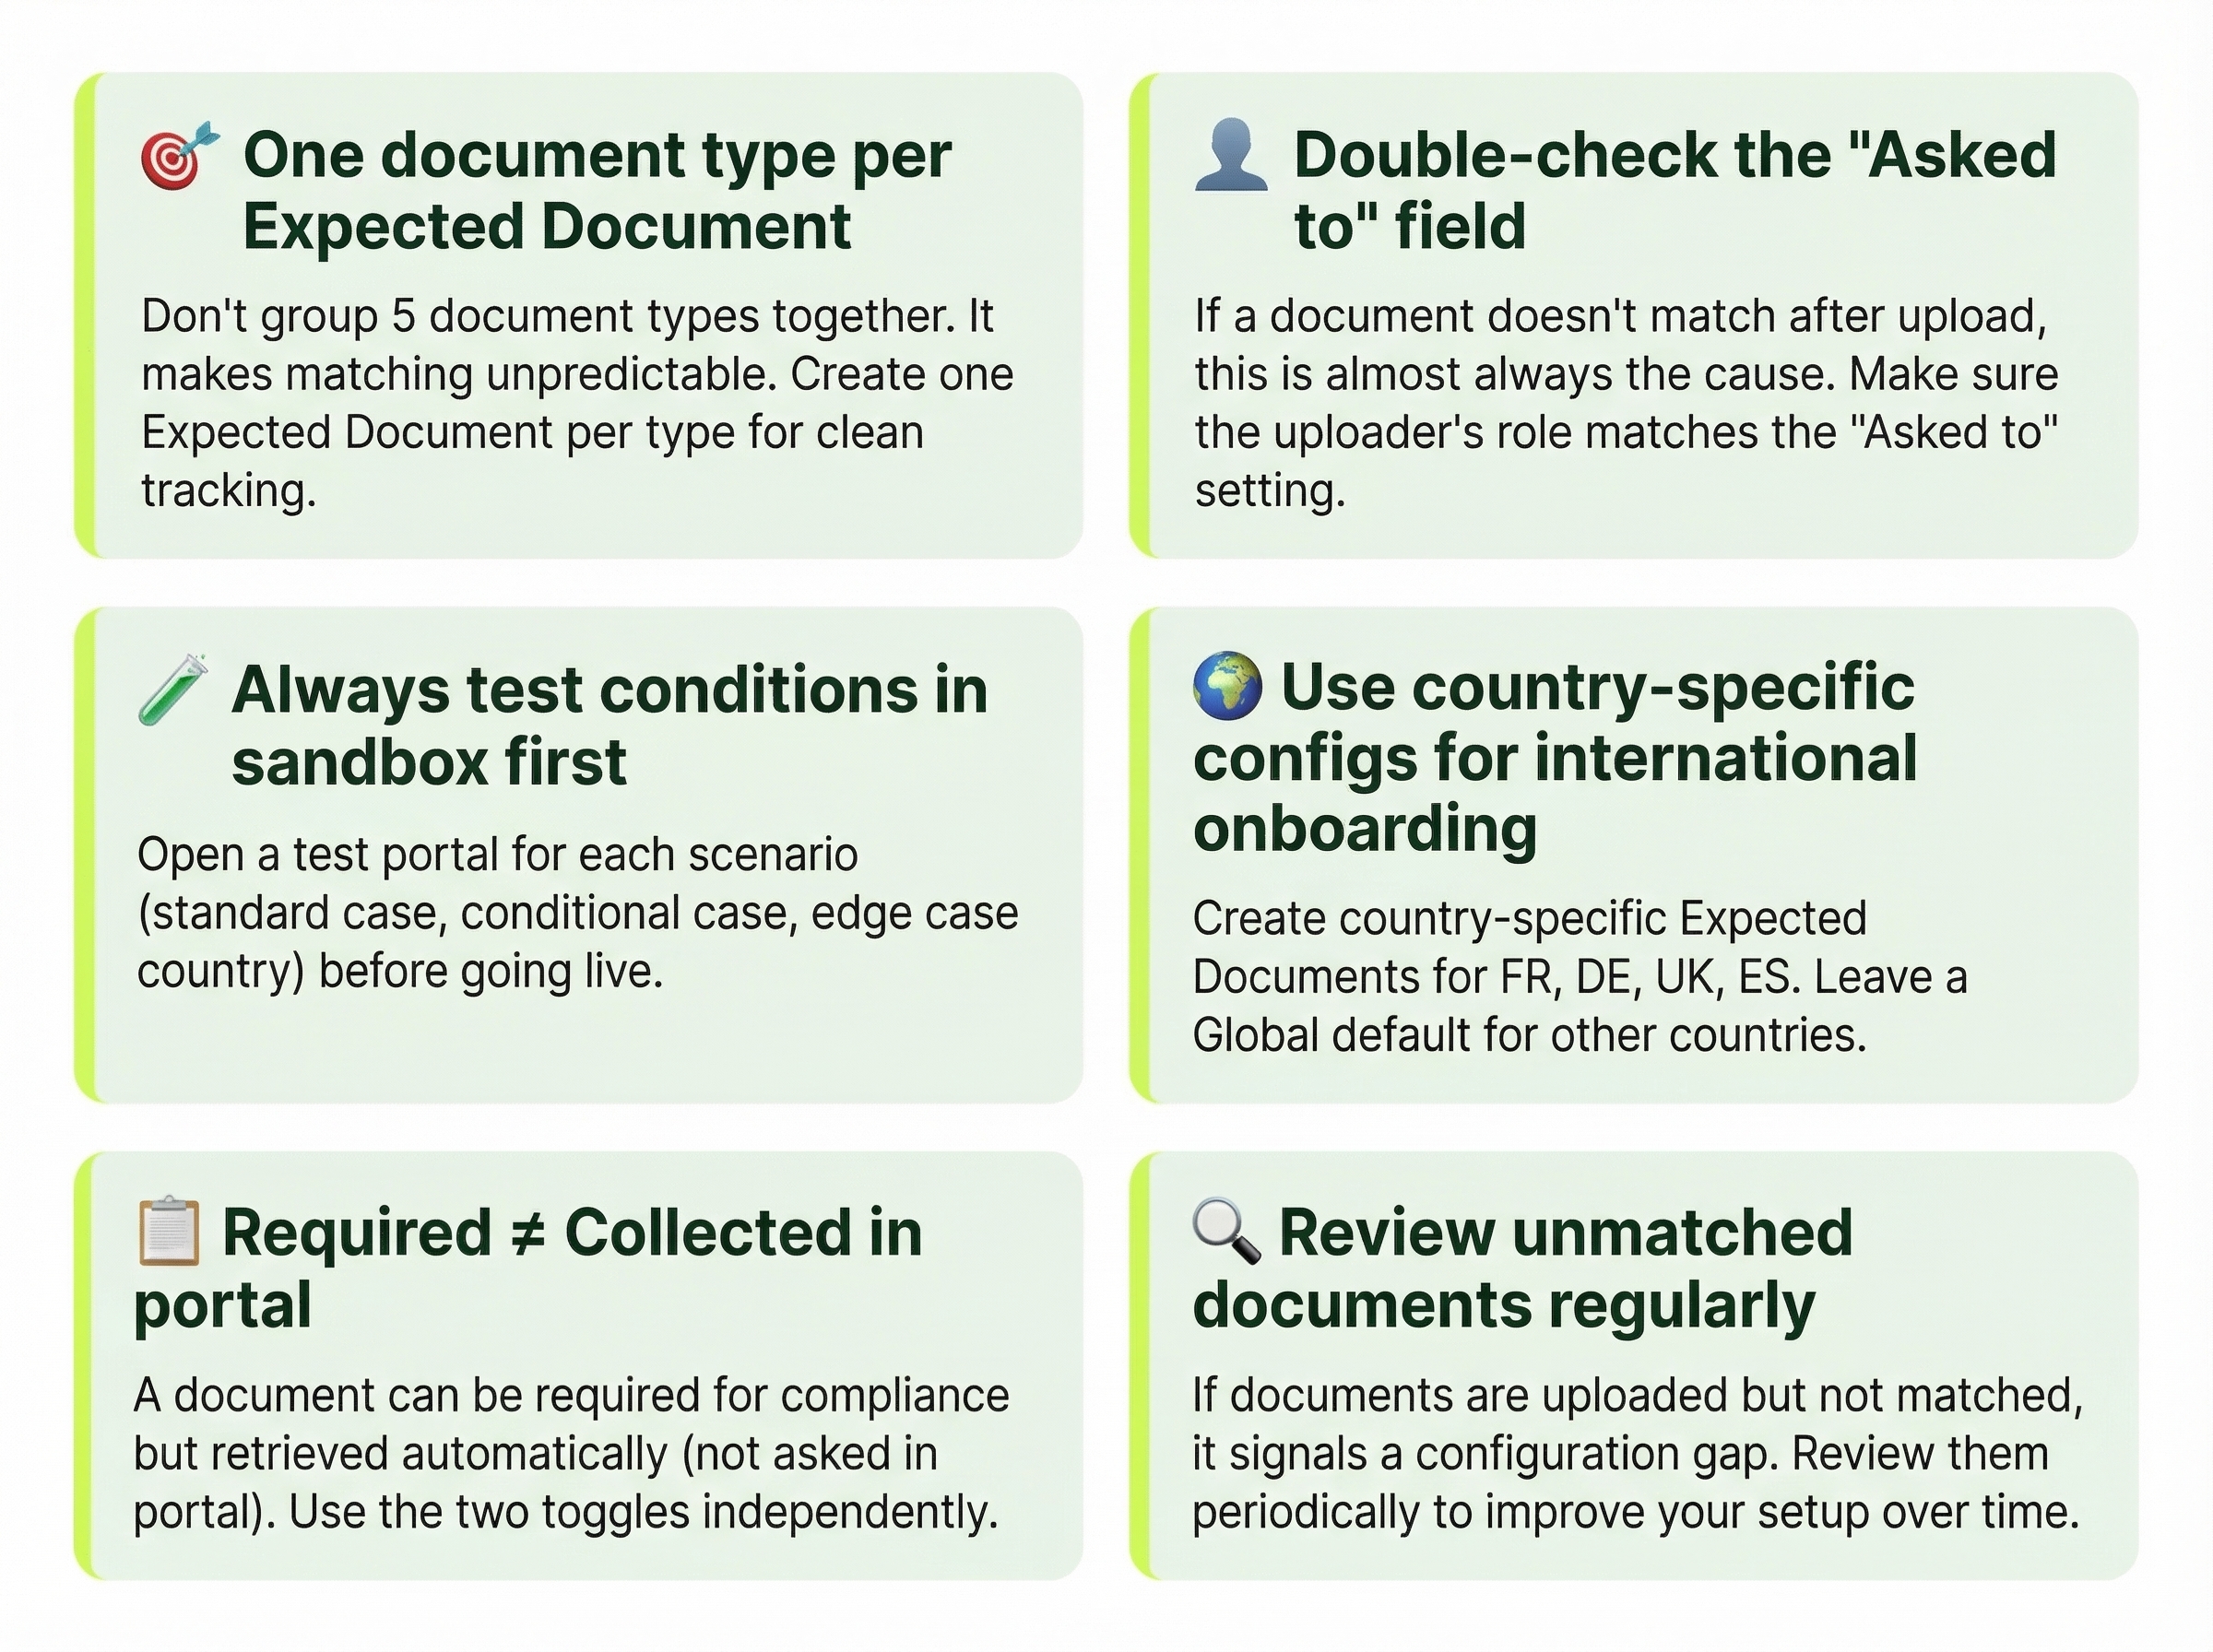
5. Tips to avoid common mistakes
Related articles
Still stuck? Share a screenshot of your Expected Document configuration and the case in question with our support team at support@ondorse.co
we’ll review your setup and tell you exactly what to fix.